Beetle Eye users can now create email templates that use a visual editor, eliminating the need to read and write code. Simply drag and drop elements, or content blocks, onto your visual template and rearrange as necessary. Once you have a content block within the template, you can click directly on the block to update the text. You can also add Smart Post blocks, which allow you to include a placeholder for Smart Post content within your template.
Creating a template
Some initial setup is required before you can edit a template visually. All templates start out as an empty HTML document.
To enable visual editing, two attributes need to be present in the HTML document:

< body be-visual-editor="true" >
This attribute turns on the visual editor.
< tbody data-be-sortable-target="true" >
This attribute allows blocks to be arranged within the template.
To complete the initial setup of a visual editor, complete the following steps.
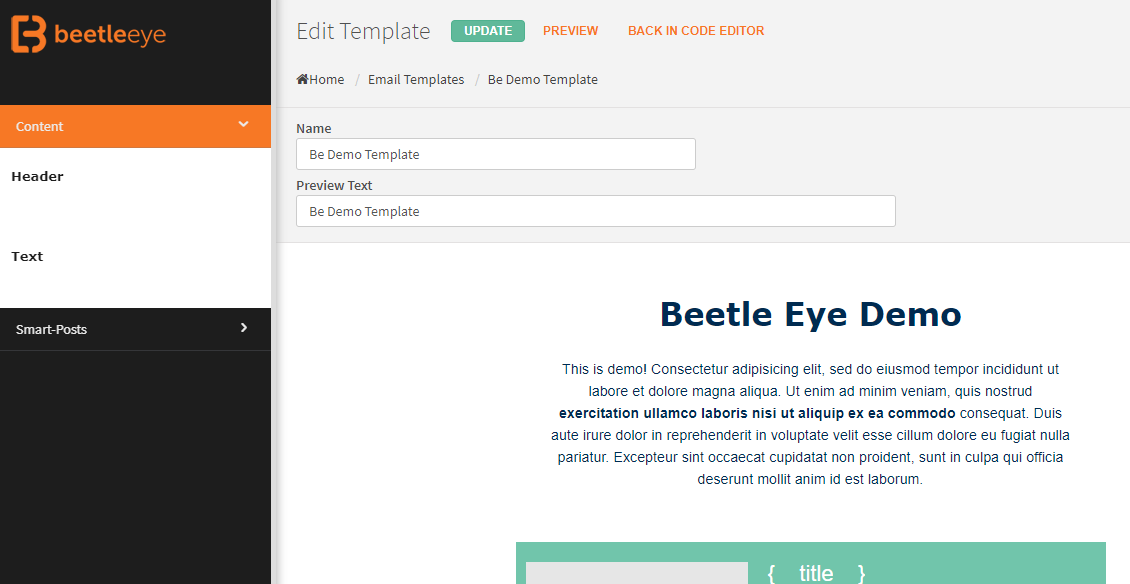
- Within Beetle Eye, navigate to Campaigns > Email Templates .
- Select Create Template.
- The Add New Email Template page displays.
- Enter the desired name for the template
- Copy and paste the following into the HTML document:
< html >
< head >
    < title >< /title >
< /head >
< body be-visual-editor="true" >
    < table >
        < thead >
            This part of the template won’t be editable
        < /thead >
        < tbody data-be-sortable-target="true" >
        < /tbody >
    < /table >
< /body >
< /html >
- Select Save.
The Email Templates page displays. - Select the Edit icon on the template you have just created.
The template loads inside the visual editor.
You are now able to visually edit this email template.
Using the visual editor
From within the visual editor, you will notice the screen is divided into two sections. The left-hand side lists the available blocks and the right-hand side shows the builder.
A template is built with blocks
Blocks are the fundamental parts of a template within the visual editor. A block represents one unit of information. For example, a block could represent:
- Header
- Footer
- Text area
- Smart Post block
- And more!
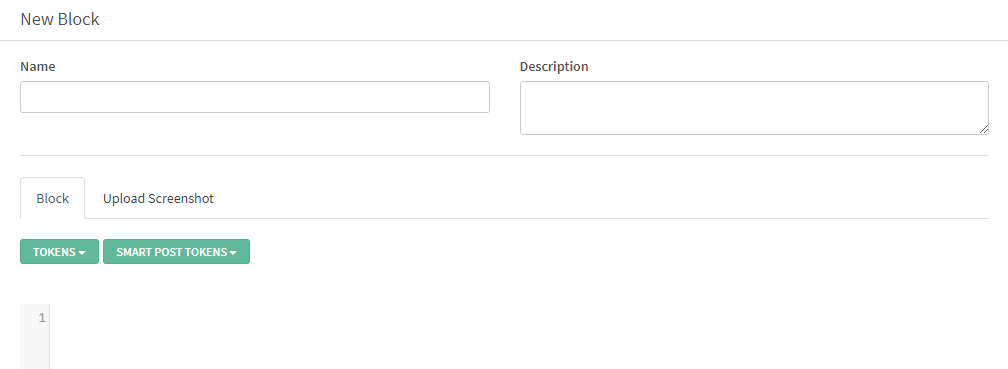
Blocks are created within the Email Templates area of Beetle Eye. A block is comprised of three fields:
- Name How a block is identified within the visual editor.
- Description Optional field that defines the purpose of a specific block.
- Block The content of the block, usually HTML code that builds what is seen in the visual editor. For example, a typical header will be something like this:
< table align="center" border="0" cellpadding="0" cellspacing="0" width="100%" >
	< tbody >
           < tr >
             < td colspan="2" height="338" width="600" >
                 < a href="...." target="_blank" >< img alt="Daily breakfast for two" class="FullImage" src="..." style="display: block; border-width: 0px; border-style: solid; width: 600px; height: 338px;" target="_blank" >< /a >
            < /td >
           < /tr >
        < /tbody >
   < /table >
You can see that this is just a plain HTML table. You want to have your blocks structured like that because this will prevent the template from breaking later when it’s composed within the visual editor.
Smart Post Blocks
Smart Post blocks are special types of blocks that represent the data you create within the Smart Posts editor. They are responsible for the visual placement and formatting of the data within an automated email. Click here to learn more about Smart Posts. Here is a possible structure of a Smart Post block:
< table be-block-type="smart-posts" bgcolor="#ffffff" border="0" cellpadding="0" cellspacing="0" width="100%" >
  < tbody >
    < tr >
      < td align="center" be-smart-post="" style="padding: 20px 5px 20px 10px;" width="33%" >
        < div style="display: block; background: #71c5ab; height: 260px;" >
          < table bgcolor="#71c5ab" border="0" cellpadding="0" cellspacing="0" height="260px" width="100%" >
            < tbody >
              < tr >
                < td align="center" style="padding: 10px;text-align:center;" valign="top" >
                  < a href="{__link_1__}" style="background-color: transparent; color: #ffffff; font-size: 24px; text-align:center; line-height: 27px; font-weight: normal; font-style: normal; font-family: Arial, Helvetica, sans-serif; text-decoration: none; display: block; padding: 0 0 10px 0;  " target="_blank" >{__title__}< /a >

                  < p style="text-align:center;color: #ffffff; font-size: 14px; line-height: 18px; font-weight: normal; font-style: normal; font-family: Arial, Helvetica, sans-serif; text-decoration: none; padding: 0px;  " >
                    {__short_description__}

                  < /p >

                < /td >
              < /tr >
              < tr >
                < td align="center" style="padding: 10px;" >
                  < div style="border:1px solid white; display: block; padding: 15px 10px;margin-bottom:2px;" >
                    < a href="{__link_1__}" style="color:#ffffff; display: block; line-height:20px; font-weight:normal; font-style:normal; font-size: 20px; font-family:Verdana, Geneva, sans-serif; text-decoration:none; text-align: center;" >SEE DETAILS< /a >

                  < /div >
                < /td >
              < /tr >
            < /tbody >
          < /table >
A couple differences stand out when creating a Smart Post block versus a regular block:
- Take note of the additional attribute that is used on the wrapping table: be-block-type=’smart-posts’, which instructs the system that this block is populated with Smart Post content.
- The tokens that are available when creating a block represent the connection with the data. For example, {__title__} will be equal to the Title field in the Smart Posts admin area.
Adding a block to a template
Complete the following to add a block to a template within the visual editor.
- Within Beetle Eye, navigate to Campaigns > Email Templates.
-
Select a template that has been set up to use the visual editor.
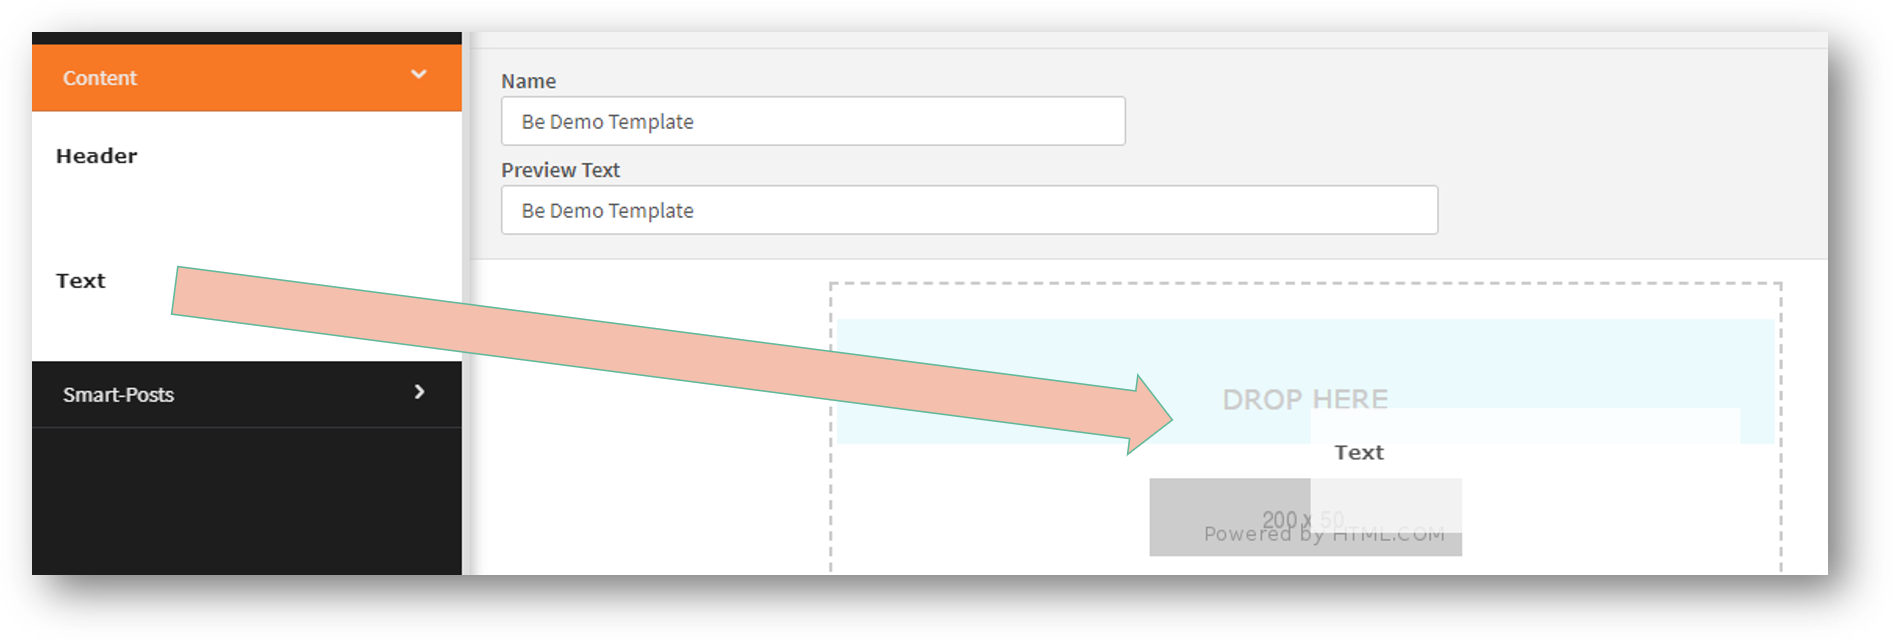
The Edit Template page displays with the visual editor. - On the left-hand side, expand the Content menu.
- Drag a block from the left-hand side and drop it within the builder section of the visual editor.
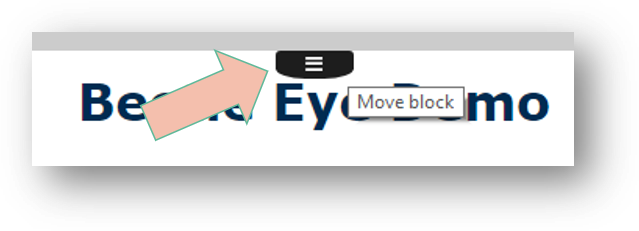
Note: You can re-organize blocks by moving them up or down with your mouse using the handler icon that appears in the middle of the block container. You can also remove blocks by selecting the X on the right-hand side of the block container.
What about adding Smart Post blocks?
Once you drag and drop a Smart Post block inside the builder area you will notice an additional cog icon that appears only on Smart Post blocks. This cog opens the Post Settings screen and is where you will direct the template on how to connect with your Smart Post data. For more information on how to connect your template with Smart Post data, see Smart Posts.
Keep in mind that the Post Settings screen is the only place where Smart Post data can be linked with Smart Post blocks. It is integral to complete this setup if your template includes Smart Post blocks.